[TOC]
一、Ansible介绍
- 不需要安装客户端,通过sshd去通信
- 基于模块工作,模块可以由任何语言开发
- 不仅支持命令行使用模块,也支持编写yaml格式的playbook,易于编写和阅读
- 安装十分简单,centos可直接yum安装
- 有提供UI(浏览器图形化)www.ansible.com/tower(收费)
- ansible已经被redhat公司收购,它在github上是一款非常受欢迎的开源软件,Github地址:https://github.com/ansible/ansible
- 一本非常不错的入门电子书 https://ansible-book.gitbooks.io/ansible-first-book/
1.Ansible的安装配置
本次试验的环境
- server1 GrapedLinux: CentOS 7.3 192.168.22.76
- server2 Linux-Test1:CentOS 7.3 192.168.22.77
- server3 Linux-Test2:CentOS 7.3 192.168.22.78
1.1 yum安装ansible
1 | yum list | grep ansible |
2.配置ansible
2.1 在server1 上生成公钥
1 | ssh-keygen -t rsa |
2.2 ssh-copy-id命令来复制Ansible公钥到本机和server2节点中,server3节点不做处理。
复制到本机1
2
3
4
5
6
7
8
9
10
11
12ssh-copy-id -i ~/.ssh/id_rsa.pub root@127.0.0.1
The authenticity of host '127.0.0.1 (127.0.0.1)' can't be established.
ECDSA key fingerprint is 96:ed:84:e0:0f:c1:71:62:fc:c3:29:fd:31:ae:8c:98.
Are you sure you want to continue connecting (yes/no)? yes
/usr/bin/ssh-copy-id: INFO: attempting to log in with the new key(s), to filter out any that are already installed
/usr/bin/ssh-copy-id: INFO: 1 key(s) remain to be installed -- if you are prompted now it is to install the new keys
root@127.0.0.1's password:
Number of key(s) added: 1
Now try logging into the machine, with: "ssh 'root@127.0.0.1'"
and check to make sure that only the key(s) you wanted were added.
复制到server1
1 | ssh-copy-id -i ~/.ssh/id_rsa.pub root@192.168.22.77# server1 |
2.3 修改vi /etc/ansible/hosts
1 | vim /etc/ansible/hosts |
至此,Ansible的配置工作已经结束,下面我们来看看怎么使用Ansible
3. 使用Ansible远程执行命令
exp1 通过选择主机组的方式在远程机器上执行基础命令

exp2 通过IP/主机名的形式,在单独一台机器上执行基础命令

3.1 有时候会遇见如下图报错
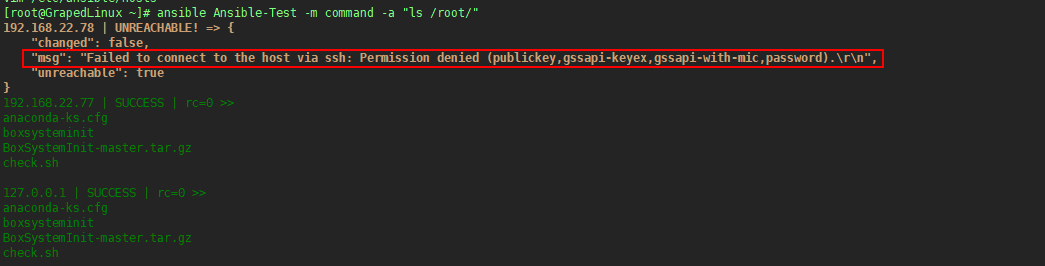
这是由于server3的主机selinux没有关闭
解决办法是:
- 关闭selinux
- 安装libselinux-python
4. 使用Ansible 远程执行脚本
exp3 通过选择主机组的方式在远程机器上执行脚本

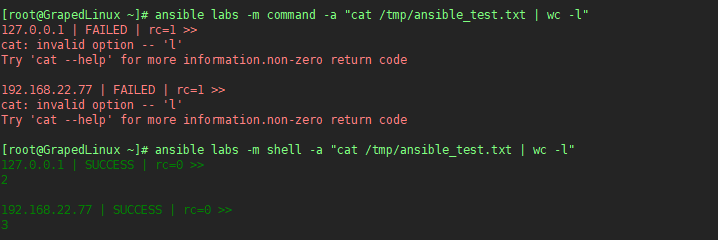
需要注意的是:
- command 不支持带管道的命令,shell支持
5. 使用Ansible拷贝文件或者目录
5.1 拷贝目录

5.1.1其中各参数表示的意义是:
- src表示源目录
- dest表示目标目录
- owner表示所属主
- group表示所属组
- mode表示权限
5.1.2 需要注意的是:
源目录会放到目标目录下面去,如果目标指定的目录不存在,它会自动创建。如果拷贝的是文件
5.2 拷贝文件
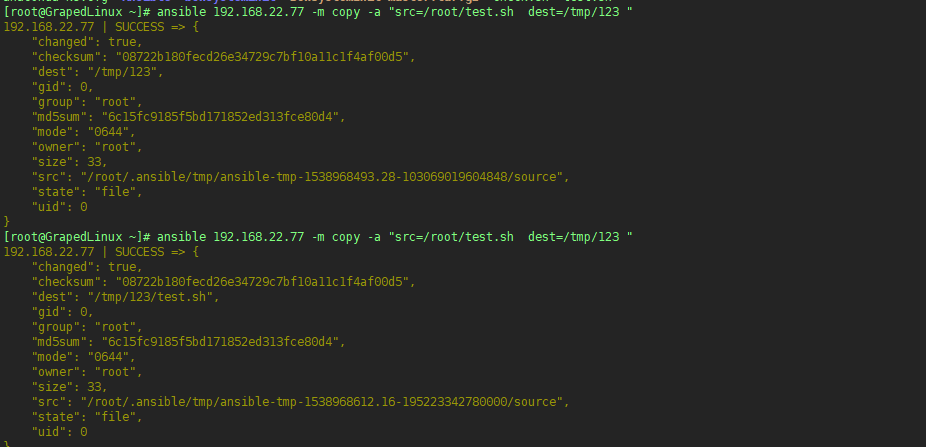
5.2.2 需要注意的是:
这里的/tmp/123和源机器上的/etc/passwd是一致的,但是如果目标机器上已经有了/tmp/123目录,则会在/tmp/123目录下面简历passwd文件
6. 使用ansible管理任务计划
6.1 在serverr1上创建任务管理计划

6.2 查看在server1上创建的任务计划

6.3 删除在server1上创建的计划任务

6.4 查看server1上创建的计划任务是否已经被删除

6.5 注意,通过Ansible创建的计划任务不可以手工更改,否则之后就没法再进行其他操作了
7. 使用ansible安装包和管理服务
7.1 使用ansible安装httpd服务

7.2 使用ansible卸载httpd服务

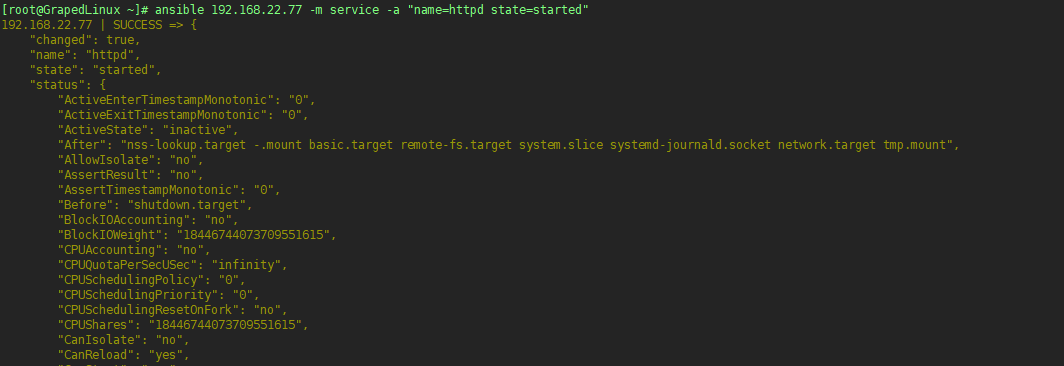
7.3 使用ansible启动httpd服务
Anbsible Playbook详解
Ansible playbook相当于把模块写入到配置文件里面,例如:
1. 编写配置文件
exp1:1
2
3
4
5
6
7vim /etc/ansible/labs.yml
---
- hosts: server1
- remote_user: root
- tasks:
- name: labs
- shell: echo `date` >> /tmp/time.txt
1.1配置文件说明
- 第一行需要有三个 -
- hosts参数指定了对哪些主机进行操作,如果是多台机器,可以用逗号分开,也可以使用主机组,在/etc/ansibl/hosts里定义
- user参数制定了使用什么用户登录远程主机操作;
- tasks 指定了一个任务,其下面的name参数同样是对任务的描述,在执行过程中会打印出来,shell是ansible模块的名字
2. 执行nsible-playbook
1 | ansible-play labs.yml |
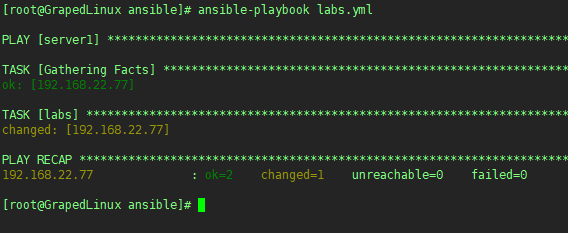
可以看到在server1上已经出现/tmp/time.txt

3. playbook里的变量
3.1 编写创建用户Ansible Playbook
exp2:1
2
3
4
5
6
7
8
9
10
11
12vim crean_user.yml
---
- name: crean_user
hosts: server1
user: root
gather_facts: false # 关闭facts
vars:
- user: "test" # 定义user变量
tasks:
- name: creat_user
user: name="{{ user }}" # 引用user变量,“{{user}}” 相当于shell脚本中$user
执行结果如下: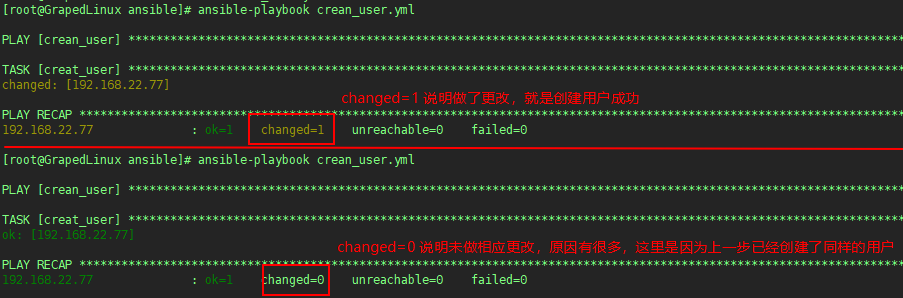
4. playbook中的循环
exp3:1
2
3
4
5
6
7
8
9
10
11vim while.yml
---
- hosts: server1
user: root
tasks:
- name: change mode for files
file: path=/tmp/{{ item }} state=touch mode=600 # 创建/tmp/{1,2,3}.txt 并富裕600权限
with_items: # 循环对象
- 1.txt
- 2.txt
- 3.txt
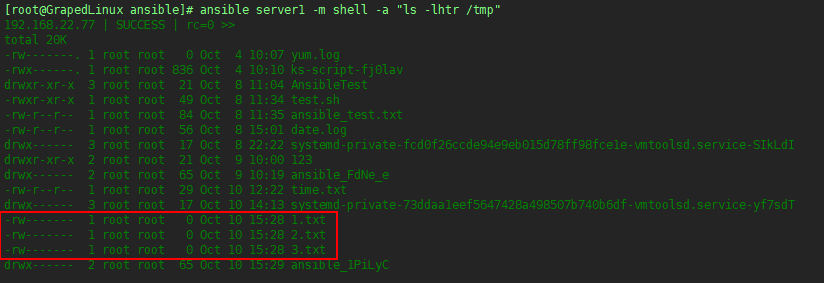
执行结果如下

执行效果如下:
5. playbook中的条件判断
exp4:1
2
3
4
5
6
7
8
9vim when.yml
---
- hosts: labs
user: root
gather_facts: true
tasks:
- name: use when
shell: touch/tmp/when.txt;echo "`date`:the ip is real" >> /tmp/when.txt
when: ansible_ens33.ipv4.address == "192.168.22.77"
执行结果如下:

执行效果如下:

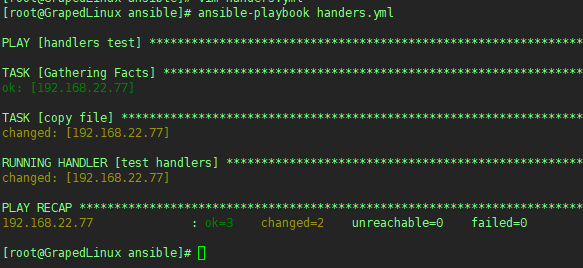
6. playbook中的handers
handers 类似于shell中的 command1 && command2
exp5:1
2
3
4
5
6
7
8
9
10
11---
- name: handlers test
hosts: server1
user: root
tasks:
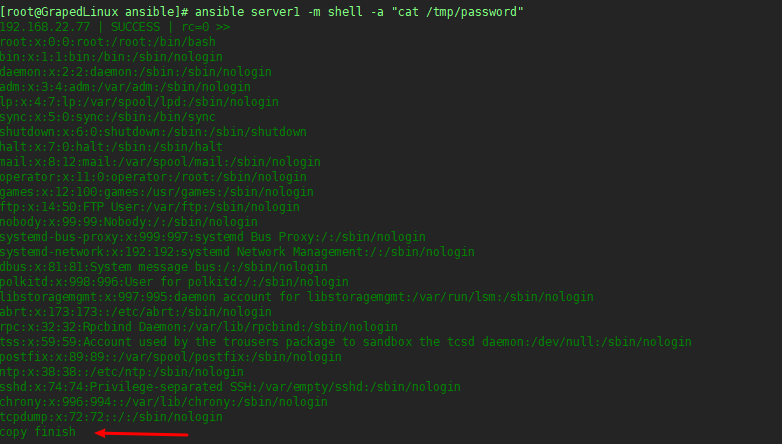
- name: copy file
copy: src=/etc/passwd dest=/tmp/password
notify: test handlers
handlers: # 上一步执行成功后,再执行下一步
- name: test handlers
shell: echo "copy finish" >> /tmp/password
执行结果如下:
执行效果如下: